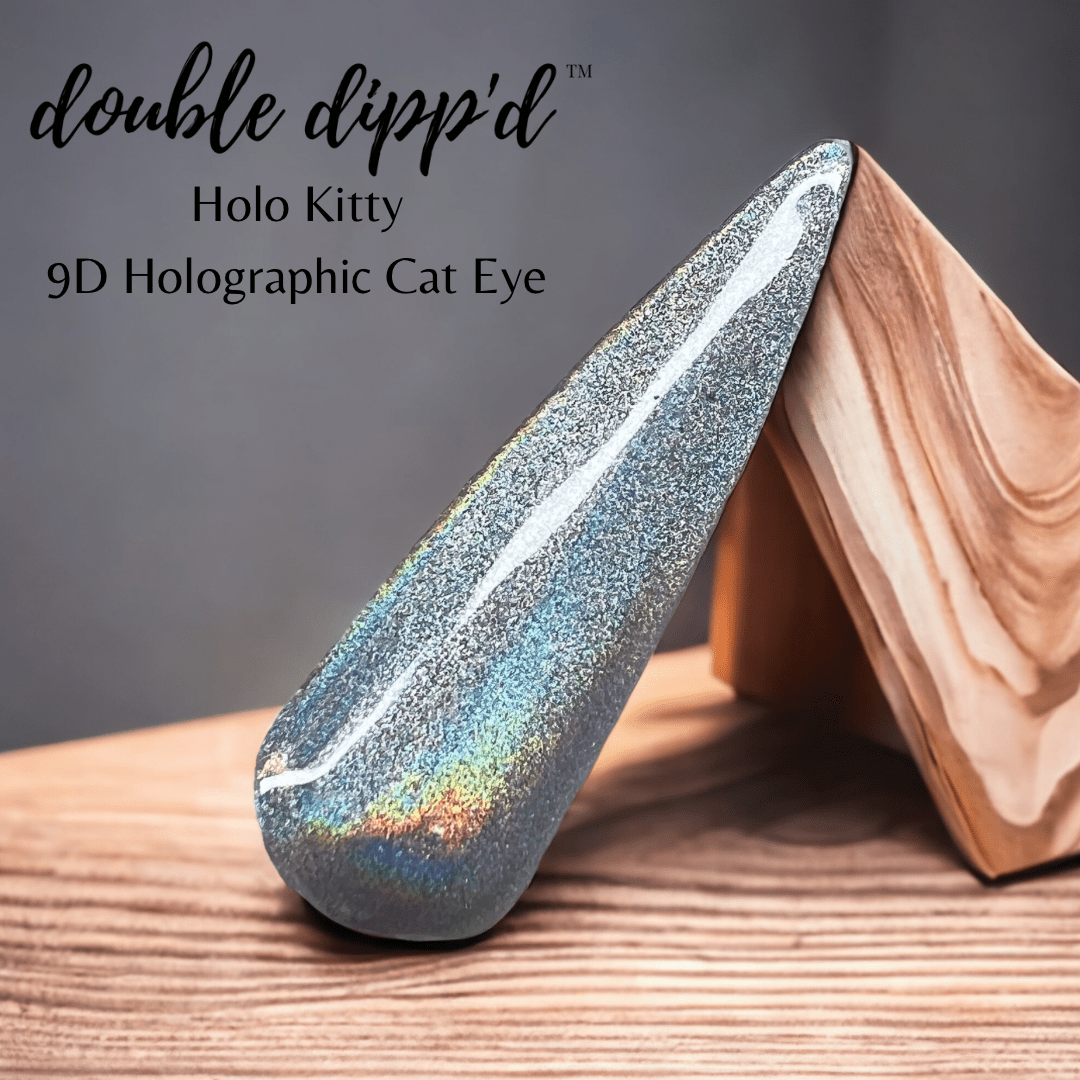
Did you know Cat Eye does not only come in a Gel Polish? Yes! Back in 2019 I made my first Cat Eye Dip Powder. At that time, Cat Eye pigments were not made as they are today. They only variety back then was the 3D kind. Now, more than 5 years later, Cat Eye Pigments have become a true vision of beauty.
The difference between a 3D Cat Eye Pigment and the 9D or 10D Cat Eye Pigment is basically that 9D or 10D Cat Eye Pigments have more finer and potentially differently charged magnetic particles than 3D Cat Eye Pigments which lead to a more intense, multi-dimensional, and often chameleon-like effect that shifts color from multiple angles.
3D will create a basic "line" cat eye effect but 9D or 10D will give a deeper, bolder, and more layered appearance by using more advanced magnetic particles.
Some of our most beloved Cat Eye Dip Powders are still loved today, even though there are more advanced ones available. And, even though technically you can use Dip Liquids with a 3D Cat Eye Dip Powder, it is extremely difficult to achieve the "Cat Eye" effect unless you work very fast.
To use any Cat Eye Dip Powder (whether it is 3D or 9D or 10D) using Dip Liquids, you will follow these instructions:
1. Dip as normal for the first coat. Activate if you will be buffing the nail (This is the time you will buff or clean up your dip if need be. Once your second dip goes on, you will not be able to do this.
2. Immediately after dipping the second coat, (using a disposable or other brush) get your nail wet with the dip top (in order for the magnet to work and move the magnetic particles, your dip must be wet).
3. Add your activator and quickly "set" with your magnet for your desired look. Once you activate, your nail will begin to dry. Depending on which set of Dip Liquids you are using, you will finish your mani with your top coat using instructions from your specific liquids.
If you do not get the look you want before adding top coat, buff and go back to step 2 and repeat these steps.
Using Gel Liquids with Cat Eye Dip Powder is even simpler!
How to use Gel Liquids with any Cat Eye Powders
1. Add your Gel Base and immediately pour the Cat Eye Dip Powder onto the nail and cure according to the instructions on your Gel bottle.
2. Add a Gel No Wipe Top Coat and pour another layer of the Cat Eye Powder over the nail. Using a disposable brush, float the brush over the nail to wet the nail with more gel top. The nail must be wet for the particles to move.
3. Place magnet over nail to get the desired effect and immediately cure your nail according to the instructions on your Gel bottle. If you wait too long to cure, the magnetic pieces can move.
4. Finish nail with an additional Gel Top Coat and cure.
5. Alternatively, you can mix your Cat Eye Dip Powder with your Gel Top on a mixing palette. This will enable your Cat Eye Dip Powder to be brushed directly onto your nail. Because your Cat Eye Dip has acrylic powder in it, only mix what you will need because the mix will harden if not used. There is no saving it.
If you do not use a separate brush during this process and if you are not careful (wiping your brush off before going back into the bottles) you risk hardening your brush or getting powder on your brush and contaminating your liquids. I highly suggest using disposable brushes for this process.
For Dip Powders containing only 3D Cat Eye Pigment, a strong wand magnet will work best and you will only ever achieve a singular "line" effect.
For Dip Powders containing a 9D or 10D Cat Eye Pigment, any strong magnet will work. You can achieve a "velvet" look, as well as multi-dimensional designs and shapes.
Cat Eyes are definitely a fun way to show off your unique style and, if you only dip and not use Gel Polish, you too can enjoy them!.
Share:
Does Dip Powder expire?
January 2026 Quarterly Subscription Blog Post